Lily's Quilts is doing a fantastic giveaway! Oakshott cottons. definitely a drool-worthy addition to anyone's stash, in colourbox form, 32 FQs!
No, I do not want you to go there! and comment, 'cos I would love to get these, but, as there are already gazillions of commenters, I suspect your couple of entries won't affect my chances too much!
Am I allowed to borrow a picture from her? I don't know, so I better not- go have a look! They are glorious!
Right, now I am going to share my thoughts and frustrations on string quilting and including selvages!
 The Stash bee for July is asking for a really pretty block. But a string block is involved. Not difficult, so now add selvages. Again not difficult per se, and a very helpful tutorial is included. Recommended is to cut your 'strings' between 3/4" and 1 1/2". the selvages need to allow about 1/4" beyond the fabric 'edge' of the selvage, so you sew both sides of the selvage down. Now, selvages are not all exactly the same width, and a margin of 'real' fabric needs to be left, to sew the next strip onto, if nothing else! And that does not allow for seeing the fabric referred to, by the selvage
So, you cut it a little larger, for the fabric to show itself off.
Now, here, I have sewn selvage onto a 1" plus strip of fabric, and only a teensy strip of the other is on show.
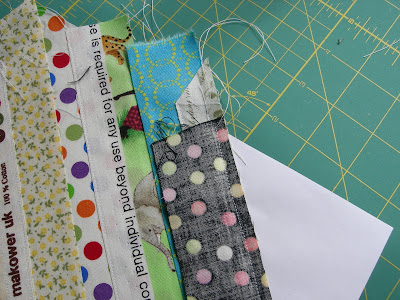
And this picture, if you look carefullyshows a selvage sewn on- before I realised I needed to allow a better margin of fabric on the selvage- and the next pice overlaid, and stitched. I think you can seethat only the selvage will show, and, if anything, the margin of seam allowance is a bit skinny!

So, The selvage is going to be about 1/2", or a little over, so to give a good border of fabric, you need to cut your selvage strip about 1". So the piece you stitch this onto, has to have at least 1 1/4" showing after you have sewn it onto the previous strip. And that will mean it has to start at least 1 1/2" before hand. And that will only leave 1/4" of the original showing. So, to work with selvages, some of the non-selvage strips really need to be bigger than 1 1/2", and 2" will give a better view of the fabric underneath. I am learning slowly!
By making it wider, I give myself a bit more maneuvrability,
So this piece already looks like it will work better.
So, sorry Jennie, it was quite a learning curve!
On the plus side, now I have finished it, I am rather pleased with the end result.
All the string pieces pieced! and starched into perdition!
And a result!
I do hope Jennie likes it.


5 comments:
I like these! Di x
I love string piecing but haven't tried selvedges! This looks gorgeous - well done Rachel - what's not to like??
I am just online on my mobile but it looks great. Hope you had fun!
I'm sure she'll love it. The white star inside makes it look incredible! :)
I'm sure she'll love it. The white star inside makes it look incredible! :)
Post a Comment