Showing posts with label blue. Show all posts

Saturday, 24 October 2020

Missing in the post.


In the summer, friends of ours were celebrating their Ruby anniversary. We were invited, by the organisers, their children, to attend the celebration. Then Coronavirus hit! No celebration. Oh. 
There is, however, no reason to not make and post a gift. 


This is a reiteration, with variation, of course, of another friend's Ruby Wedding gift. This is what came out of my sewing room


The back is modern, and simple. 


The front is more detailed


So, you then wrap and post it, with a letter, somewhat later than you should because the ooomph to get it done is absent, and you sit back and await news of its arrival. 

And it does not arrive. 

Posted first class, and now the Royal Mail have lost it. It is not the first time the Royal Mail have lost my packages. I have even stopped using one post office in particular because so many of my postings have gone astray. This was not from that one, but again it is lost. Tracking tells me that it will update once delivery has been attempted. 

I can, of course claim 'compensation' Except that they require proof of value. And a hand created special gift will not have a receipt that you can handily take a photo of. So, no possible compensation. Of course, what I want is for the gift to arrive. I do not really wish for compensation, I really wish that someone out there in the sorting offices would find and deliver the parcel. No way to request that on the website. 


I had seen a drunkards path variation on the internet, and I have cutters for Drunkards path, so I thought I would have a bash at it. I have learnt from this one and would trim my blocks rather more if I did this again. The challenge was in the working out the first version though, so I doubt I would do this again.

Quite pretty though. 


Saturday, 9 May 2020

Lockdown has some benefits?

I have been absent for some time. Most folks know that we have had trying times and sewing has been very low on the priorities. Sadly.

More sadly, my responsibilities have reduced and I am finally able to start sewing, and to enjoy the sewing. Only a few little fairly straightforward projects, but it is a start.

Last summer my DD2 and I painted our garden bench, a pretty shade of blue. And the next thing was, it needed a seat cushion. Luckily- or not so luckily, the weather took a turn for the worse, and sitting out became a non starter. This year, as good weather began, I finally made the cushion!


The fabric is one I was given, as 'spare', by a friend. It was bought in IKEA many years ago, and there is a shade of blue in it which matches the bench beautifully. 
I may say there has been more bench sitting this year than I can ever recall.  Yay! for seat cushions. The weather helps, of course! Though on Thursday I was up sewing and heard the rain begin! We had one of those drenching downpours, which caused me to race down the stairs and out to retrieve the cushion, in bare feet! No harm done, and the comfort is excellent. Thanks Jan!

Some years ago, I made a bag for work. This bag has had daily treks to and from work, trips overseas and has generally been ubiquitous,. Everywhere I went, so did my orange bag. In the fullness of time, the strap started to wear, and the wear got worse, and really the bag needed to retire. 
For that to happen I needed a new bag. 


Tadaaa!


I will say I was very happy with my pattern matching on the front, that flap really does have a good match on the elephants. 

and on the back I quilted round the elephants.
 Who doesn't love an elephant?


I had also promised my DD2 another simple coin purse. It is one of those things that you promise and then it doesn't quite happen... Finally it has.
I found a pattern on pinterest, ( free, good price point!) and did it. Simple, easy to follow instruction, though the instruction wanted me to hand sew the lining in place.

Well, you know me and hand sewing...

Of course it can be done on the machine.

The first one I tried to make it by sandwiching the zip between the lining and the outer. It got complicated and fiddly, yes, it worked but I still ended up with a little hand sewing, but it was OK. That was the pretty turquoisey one with the yellow zip.

I had to have another go, though. So the dark red one also had to happen. This time I did make the lining up separately, but I topstitched the lining into place with the machine. No hand sewing at all- or anyway, just hiding my ends.


So this pretty pair have been adopted by DD2.
I am now considering my next project.


And what are you up to?


Technical bits Elephant fabric- Abakhan
Pink linen- Abakhan
Zips- JaycottsTurquoise fabric for purse Minerva
others- no idea!

Sunday, 31 March 2019

Odds and ends..

I am remiss, I have not been keeping up, but then not a lot of sewing has been happening...


This is mainly because other duties are superseding the sewing room,, including more and more hoops to jump through for work. It is not work itself that is the hassle, but the extra bits, which one must do to keep working and for which one does not get paid....

However, that little oven glove appeared and was given to someone who, strange though it may sound, loves dachshunds. And blue.


Well, I think they are jolly wee dogs, too.


I have also done one or two other small items, but they somehow forgot to get themselves a photoshoot. I expect I had other stuff to get on with...

And we did squeeze in a holiday, where we managed to hit, accidentally, on the Spanish version of Sewing Bee!
Completely different, and oh so much more challenge... I loved it. Even though I speak no Spanish! Try it, when you can find the time- Maestros de la Costura... It takes a completely different tack...

Sunday, 6 May 2018

and done!

That quilt is now bound, and is ready to land in it's intended destination. I am very happy with how the binding went on.
Any quilt police looking?   no?     well, I overlocked all round the edge before putting the binding on.


As the overlocker's 'bite' is just on 1/4" it gives me a neat finish, to which I can then apply the binding, and as long as my seam allowance is just a tiny tad bigger, the overlocking is hidden, and I have a neat secure edge to work with. 


And here is the back. There is a fun play of reflected sun from my windows on these ones, with the morning sun in my garden. 

I think I can call this one DONE

Saturday, 5 May 2018

Adventures in FMQ

I have admired peoples FMQ for a long time. I have wanted to have that skill, so I could FMQ and feel, well, happy with the end result. But it takes practice. And I do not want to have to practise.

However, I had a little project just for me. So I am not inflicting my substandard work on another unsuspecting body. So, is this not the perfect time to get on with it?


I am going to pop this little fellow in my car- that emergency blanket you are meant to carry? Yes, this will be the one.  So, as it is for me, I could carry out the plan, to FMQ.

I started by doing one line of an old pattern that I like, seemed suitable, and that is adaptable. This first one is not FMQ. It is done using the walking foot and a blend of manipulation, organic line, and stop start while moving stuff around. I have used this leaf and vine pattern a few times, I lay no claim to it, but I always just did it off my own bat, without thinking too hard. That is the left hand vine on the photo above. 

Then, I put on my quilting foot, put my feed dogs down, and went for it with the FMQ version. The first try is that vine on the right in the photo above. 

 And then I did more lots. Some are better in some places than others are in other places. That is what practice is all about, though, isn't it?
Yes, I can pick fault all the way down the line, and there are some bits which would benefit from pulling out and restarting, but, the whole effect seems to me to be acceptable, if not perfect anywhere. I finally feel I have started to FMQ in a very rreal way. I have ended with an item I can be not too ashamed of!

Now, don't you be pulling too many holes in my work, I have very tender feelings just now!

What have I learnt? 

Reduce the pressure on the presser foot, even though you do not see that it should be needed as the quilting foot doesn't really hold the quilt down- It still helps!

Perhaps a broader sweep of pattern would be an easier start. I should have worked up to those fiddly leaves a bit more.

Be content with 'acceptable' do not insist on 'perfect' . 

For the lines across the bottom, which were done after the leaf pattern, I FMQed those too. There I found a better result with 'pedal to the metal' but trying to keep my 'feed' fairly slow and even going through. Still not perfect, but it will do!

I still need to bind it, but shall have to go and buy the fabric for the binding, I just do not quite have enough to do without.  Ho hum. 

Any thoughts, folks? How did you get on with FMQ? Have you tried it? Are you still too wary? 

Sunday, 8 April 2018

Design issues

Confession time. Ok, I bought fabric. I needed a particular type of design for that birdie swap.


But, yes, but. I loved the colours, and the design, so I got rather more of it than I strictly needed. Apart from the fact that they were not exactly going to sell me just three or four motifs, now were they?


And I got some coordinating fabrics too.

And I had an idea for a quilt top using these with some solid alongside.

And then I got to planning.


So, the next thing is to look at how the motif will fit in the item, and to measure the repeat.

This is where it all starts to go pear shaped.


( Interesting reflection from the window there almost looks like a pattern piece... )

The horizontal pattern repeat  is 6". In other words, Quilt-Speak as it were, 5 1/2" finish, maximum. 


Then the vertical repeat is 3 7/8", so that puts us into 3 3/8" finished, maximum.
What on earth can I do with those figures?

Apart from that, either the pattern is not quite printed straight, or the fabric had warped, so it is not quite cut straight. There will be some waste.

So, watch this space, I am working on it! I have some ideas, but.....

Any suggestions out there? Please?


Wednesday, 7 March 2018

last swap

I joined a group a wee while back, and have had a few swaps with them. Sadly the numbers swapping have diminished, so now the swaps are done. Not enough folk happy to make and post off to who knows where for the joy of an exchanged swap. So, my final offering for this group was
'Put a Bird on it... and in it!'
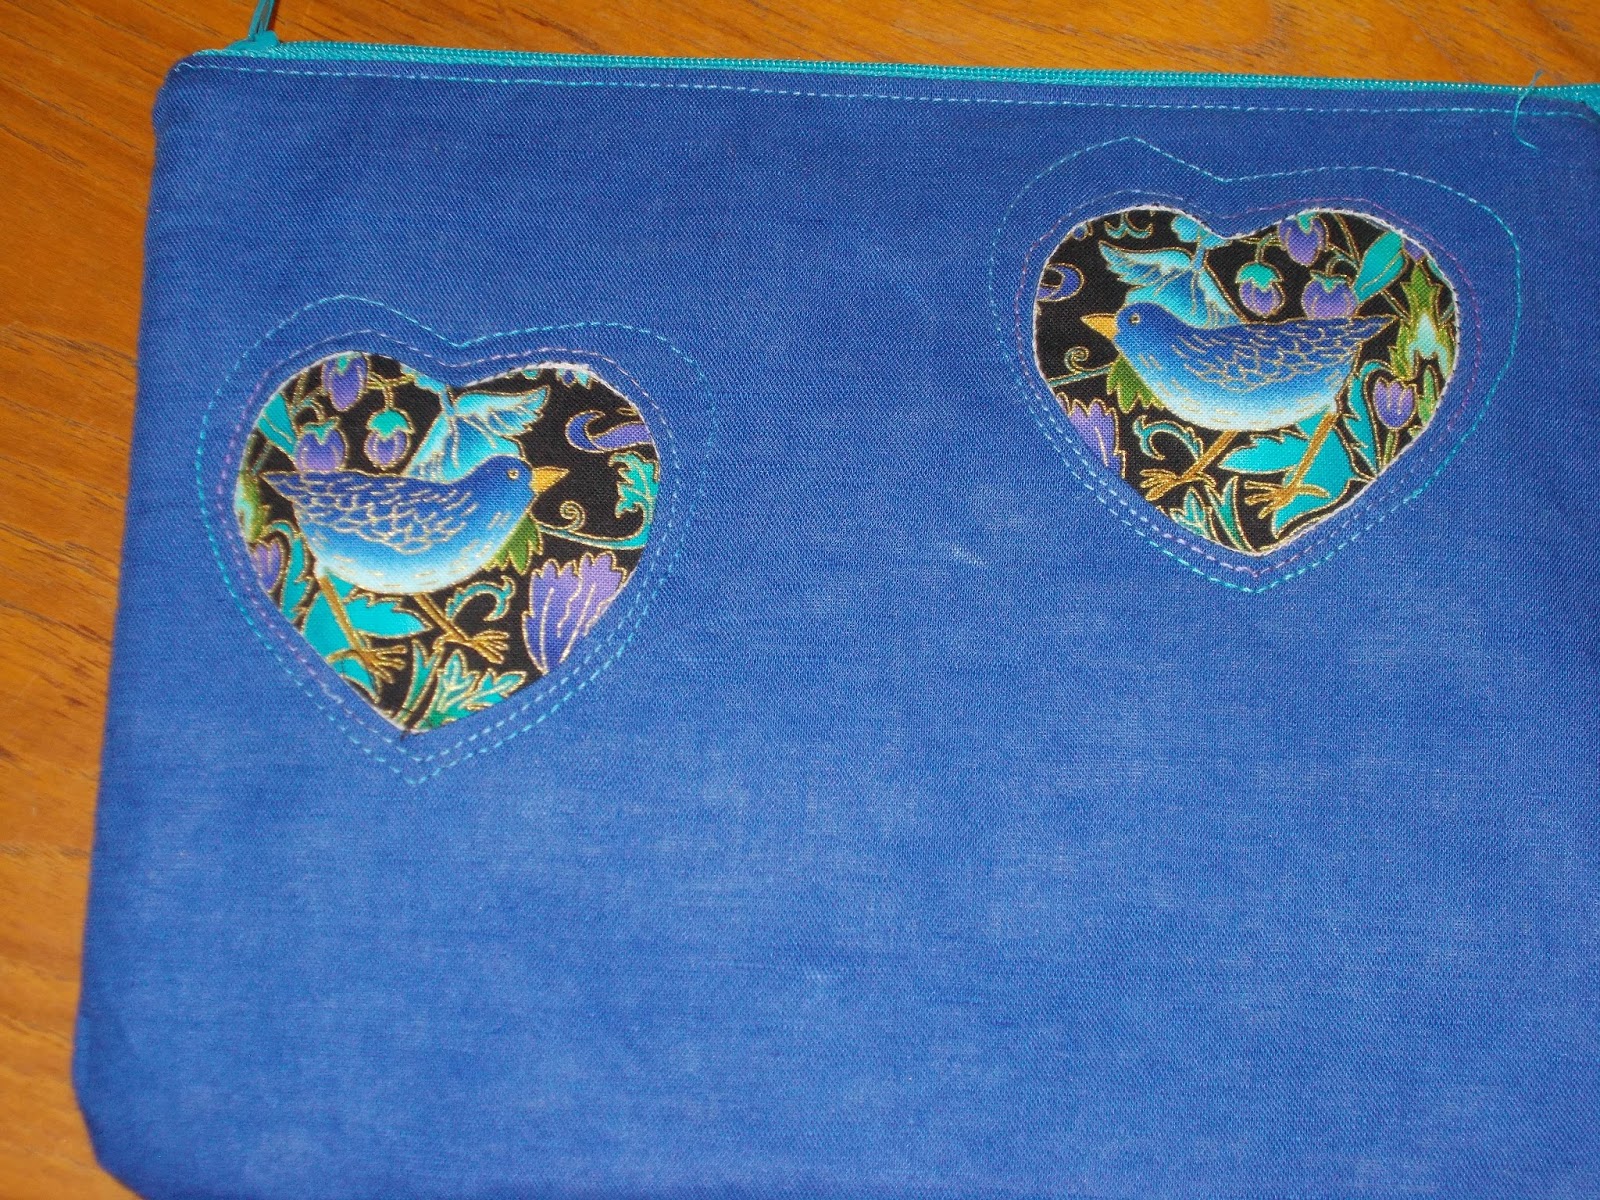
 I found amazing glorious rich fabric with a bird, just perfect for putting a porthole into, and showcasing the little chap


I love a sneak peek, so I out up this picture and my partner quickly responded, so I was certain she liked where I was going.  The blue linen I had had for another task, so it was a simple choice to make, and I had a pretty variegated thread which pulled up the colours in the bird fabric.

 I saw a tutorial on youtube, which showed how to make a pouch with multiple pockets. I vaguely followed that, but made my own dimensions, so this ends up with two large pockets, one small zipped pocket and two slips between the small zip pocket and the larger pockets. All fastened with one large zip across the top.


To put a bird in it I looked at owl pincushions here there and everywhere... I looked at how they were constructed and then off I went and redesigned the dimensions to make my own version- thank you everyone out there who has published their own versions!

Basically, you draw an isosceles triangle, then a shorter fatter one. Cut from chosen fabric.  Match the bottom edges, and sew one to t'other, and then sew the other side, wrong sides out , also stitching the top part of the larger one. Flatten him out, and trim the point, then turn. Fold down the top point and stitch firmly to the middle of his tummy. Gather stitch round the base.

Cut out a suitable size cardboard circle- I use the famous cereal packet for this- and cut a circle of fabric for the base about an inch larger in diameter. I then interfaced this circle, and gather stitched the edge, and pulled it in carefully round the card. Press like mad.

Now stuff your Wol, as fat and firm as you please. I used polyester filling, but walnut shells are probably better- just a major dirth of these in my house- and hand stitch the base to Mr Wol. Plump him up, add suitable eyes, and you are done. He is a really quick make.

Confession time- I meant his feathers to point down, but cut him wrong... so he has slanty feathers. Sorry partner.. But she is quirky.   She has been named Georgina, by her new human. Most suitable I think!


I was rather chuffed with the finish. I think there may be one or two more of these before I am done...

  When I was making my pouch I managed to make a boo-boo. I put my bird in facing the wrong direction. hey, it happens. So now, I have a piece that needs using, but is not quite what had been planned.

A few years ago I got a book- given? bought? not sure. called something like Zakka style.. This wallet was in it. not quite the same size, but I adapt most things, so a variation on the theme of the zakka style wallet appears.
I love how it opens out quite flat. You can see my birds facing away from one another. It works for this though!


Again, I think a few more of these may appear shortly.


A couple of owl buttons, and a few other sundries, and my parcel was ready to wing it's way across the Atlantic, which it managed in just under a week...

My partner has received her package, and seems to like it!

This was a secret partner swap, so nobody knows who is sending to them...  Sneaky swap mamas gave us each other! Fantastic sneaky mamas!


I will blog about what I received soon! It was rather lovely... don't hold your breath though.. I am busy just now.. Costumes.

Wednesday, 24 January 2018

So how long does a UFO wait?

There are projects. And then, there are PROJECTS.
You get so far and somehow do not make further progress. They stall somewhere between a partial finish and a complete one. So, the first one is a quilt along. From the lovely Crazymomquilts.  Now I know she was doing it in 2008, but I am not certain when DD2 and I decided to have a go. And I have no idea how I came across it.
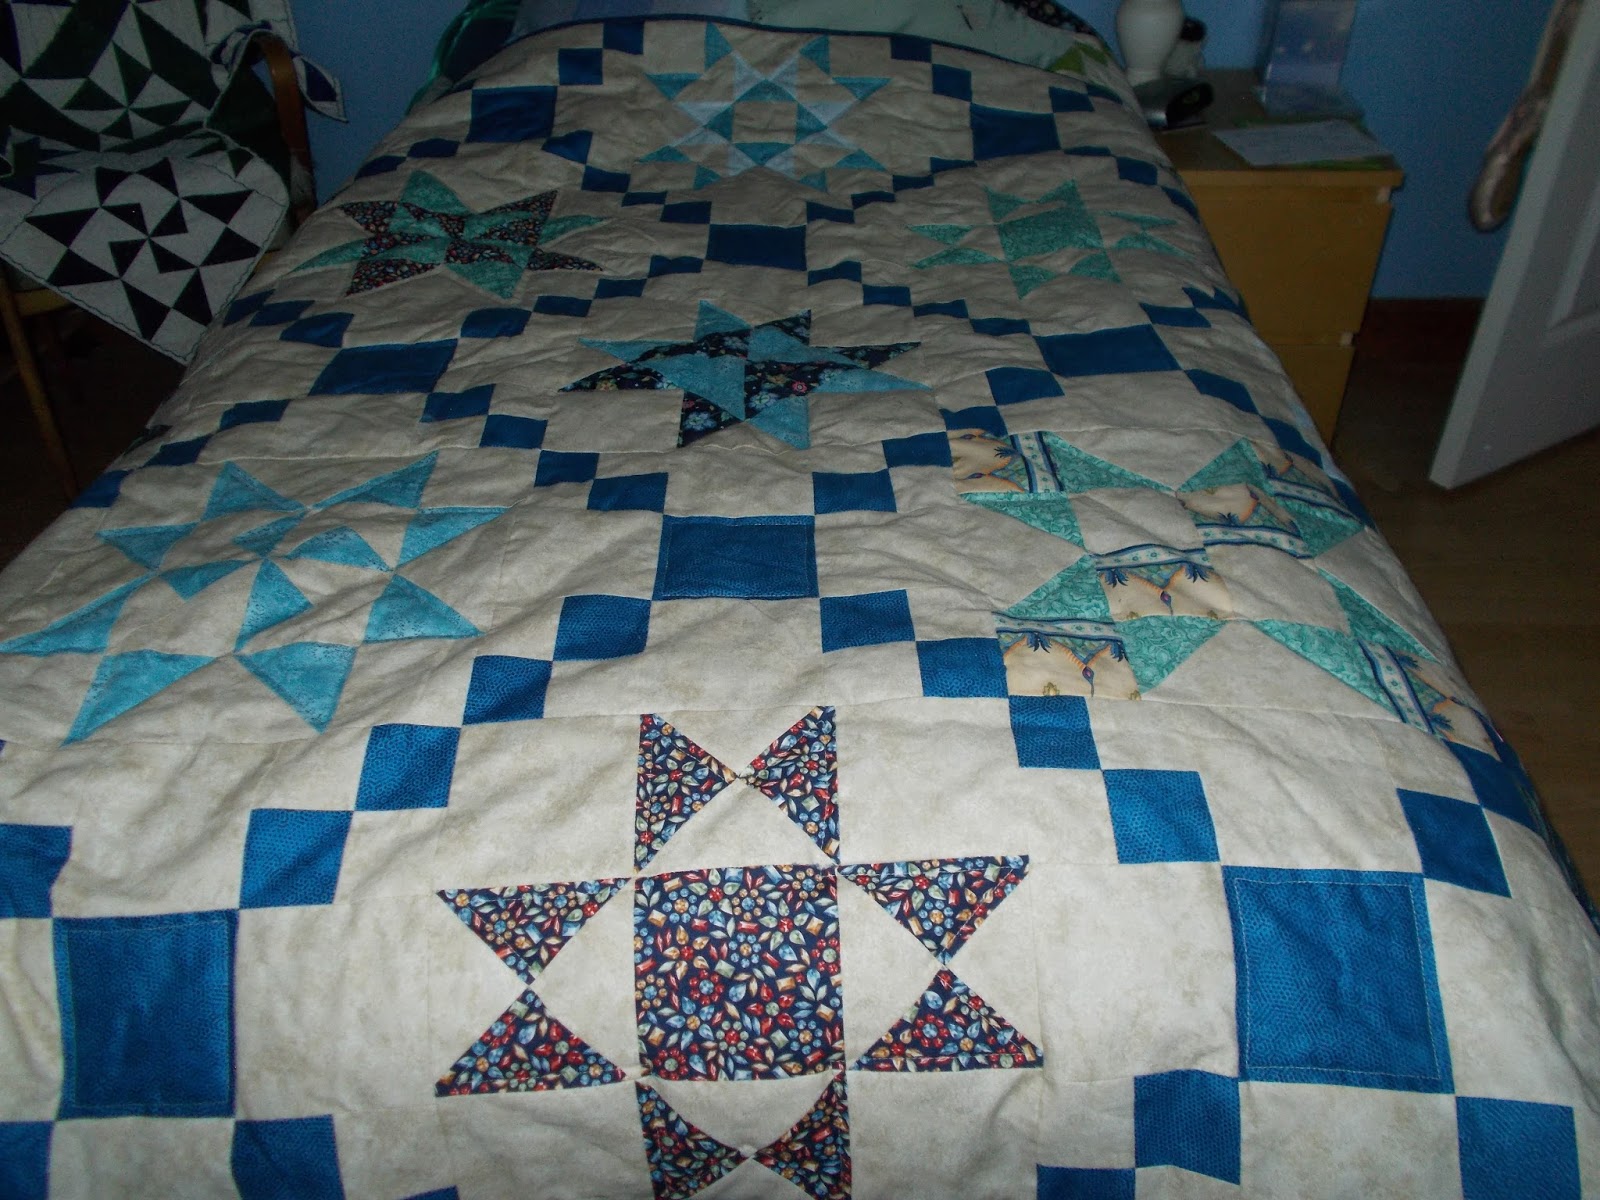
 So here, I proudly present.... Drum roll..... Trumpets....  our Star quilt!


Here laid out on the sewing room floor. It has many many faults. Points that are nowhere near pointy, seam allowances that wander to and fro, squares that fail in the first requirement- to be square-ish... But, when I look at it all laid out, I feel good!

 and laid on DD2's bed
 All rolled up- that is obligatory isn't it?


And, in the scene of crime!

I shall see if my DD2 can recall when we got it going, but I reckon it is at least 5 years ago.

And then...


This piece of work resurfaced when I was doing a clear out of the sewing room. This is almost a piece of history. It will have been worked in the days before I had children. That places it over 30 years ago. I worked it, and put it away so that I could do something with it - eventually. I am pleased to say, eventually has appeared! I had just finished the quilt, and this sat waiting my pleasure. Now, when I was doing my clearance, I also found a number of oddments of velvet. I thought one of them might just come in for this treasure.. I auditioned a couple of colours, and settled for this one..


I have mitred corners, while ensuring the nap runs correctly, and inserted a zip at the bottom, other than that, keep it simple.
I suspect I shall rehome it with a friend because of the colourway, but it may just quietly sit in the hall here, and grow good.

Two finishes in one day, and just before the next costume marathon begins! Roll on costumes!

Sunday, 21 January 2018

100!

It is not every day one turns a hundred. However I have just returned from just such a celebration.

So, what does a 100 year old get for a present?
Well, all the usual options are there- flowers, plants,. sweets, biscuits, and so on. but she has a house full of stuff, eats far less than once she did, and, let's face it, the world and his wife will give flowers and sweets...
A little thought is needed.

so this is what has been achieved, for an Irish Aunt, who is a fit and healthy 100 years old!

Celtic lettering for the initials, to ensure it is very personal and then the Celtic style interweaving for a border, in colours I thought she liked. Do not look too hard, there are some errors there, but by the time I realised, I was not unpicking all the way back to that first corner!


a more subtle Celtic design on the reverse

 and the relevant dates on the reverse, too. They were hand chain stitched, and if you know hwo much I love hand sewing you will understand the dedication...
 Applique letters first, that light turquoise is a favourite colour..


and bias tape made from linen for the interweaving.

Happy birthday Haunt! Love you.

Sunday, 29 January 2017

finally! a Bee quilt!

 Eons ago, I started a bee quilt. Blocks were assembled from this one and that one,  I had decided on a tessellated design, so backgrounds for blocks were in squares, to be finished 12" or 6", or rectangles, to finish 62 x 12". Add a restricted palate of bright cheerful hues, and then have great fun organising and arranging these.


Then, the real fun begins. Several part seams. some slightly under or oversized blocks- you may think, oversized is easy, just chop a bit off, but when a design gets near the edge,, that is not always a wonderful solution...
 Then to quilt it.
I knew I just wanted to do a cosy fleece backing   ( Quilt police , just do not look, please!), and I had some variegated thread to work with. I did simple organic wide quilting to anchor everything, and then, with trepidation, and after several practice efforts, I actually did odd bits of FMQ in a few places.

Go me!
 See that flower by the wee birdie?   yes, that is one of the bits. Or does this count more as embroidery? I am not quite certain, but it was free motion, so, that is a start.


And there you see my DS, home for the weekend, holding up the Bee masterpiece! He and his girlfriend have trotted it off down to London to cheer their wee home up a bit. I am very happy to see it go off to a happy home, to be snuggled under.

I was chuffed to bits to get the effect I wanted with those varied size blocks.

Thank you everyone who contributed.


Sunday, 13 September 2015

busy...

Having decided on a new project I have been getting on with it... and I have managed 9 blocks so far this weekend... back to the fray!  but just now they are kind of secret... You will have to wait!


Having made damson jam, it is always good to share a little.. so two pots trotted off to a new home, with nice wee hats on their heads, and a cosy little basket to sit in for the journey..  The recipient loves owls, so I found a few to go with her jam...
I even lined the little basket the jars went in with some owls.. 

I think another time I would make the dividing flap attach to the sides of the basket, so it did not fold down, but this was an experiment, and I was quite pleased with the result.. 


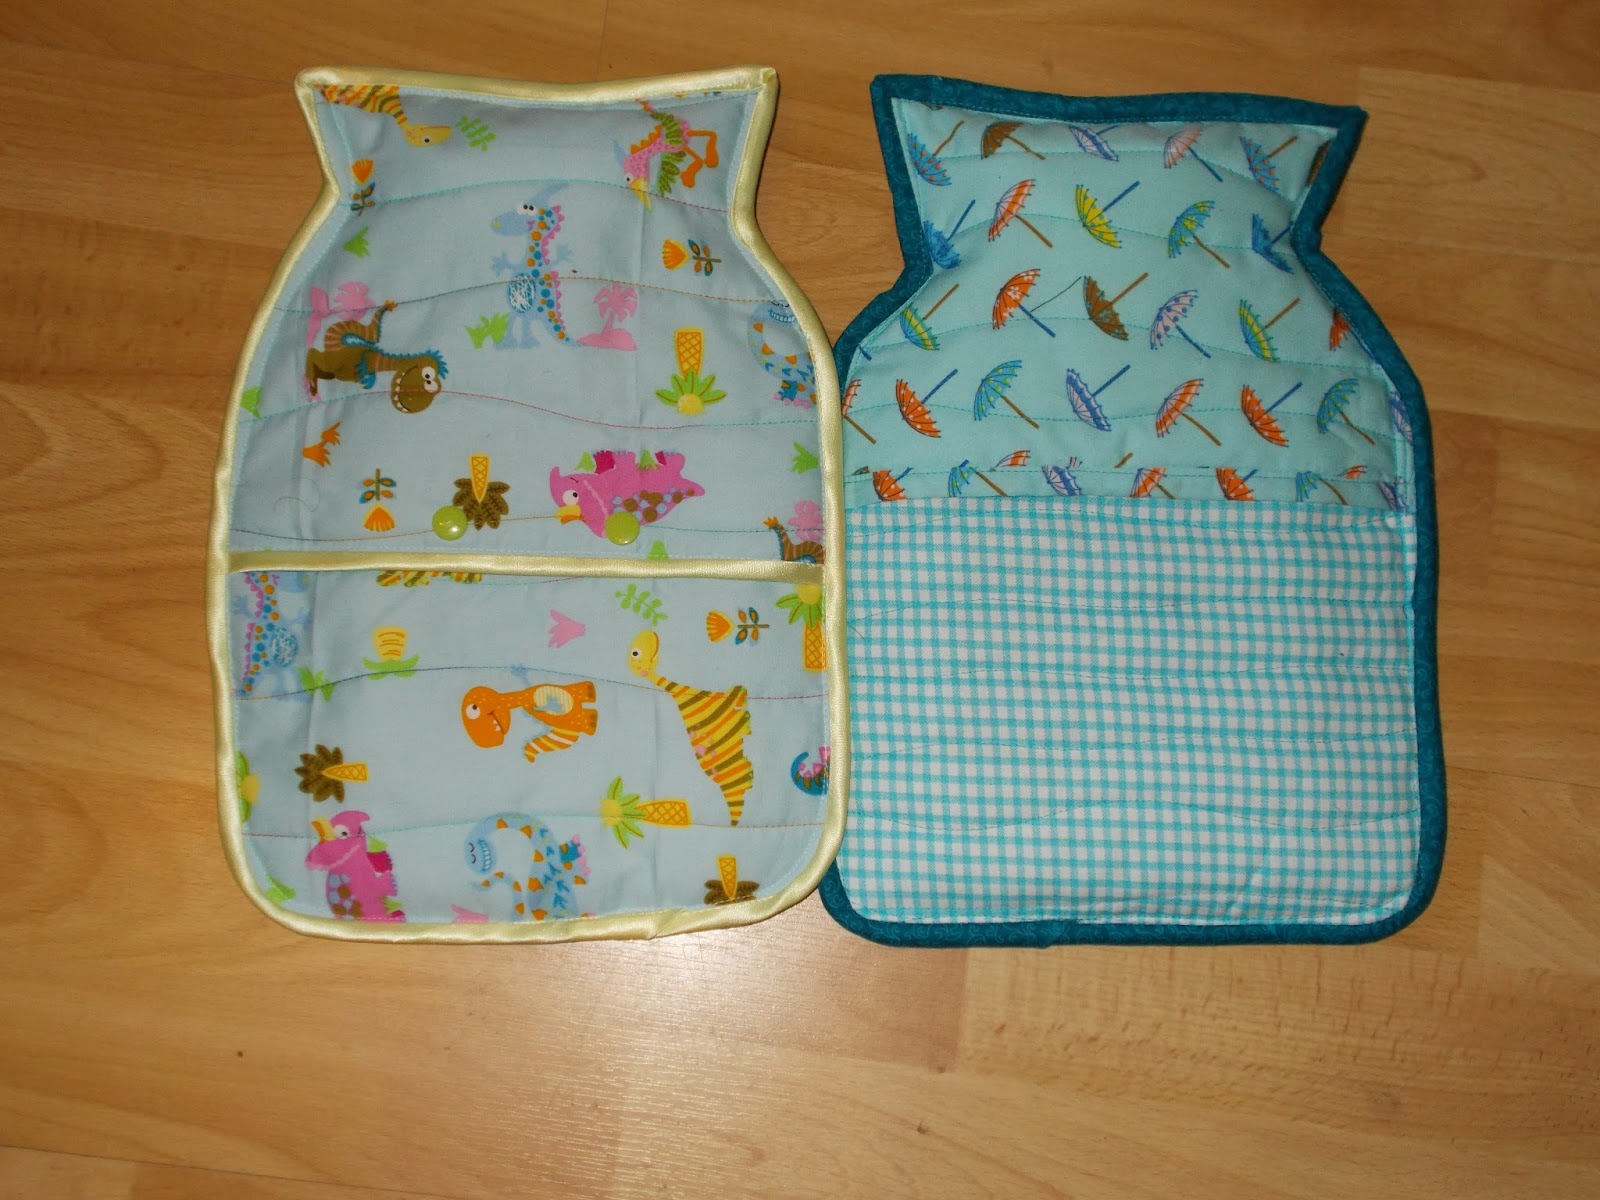
Then another friend did not possess a hottle bottle... and sometimes the comfort that a hottie gives just cannot be replaced by any other source of warmth... As there is a small one also in the household, it felt right to make a hottle bottle cover for both Mum and Small... 

I wonder who will win which one?

I know the dinosaurs are intended for Small, but you just never quite know!


These hottle bottle covers are a quick and easy make. Can you tell I had fun?

Related Posts Plugin for WordPress, Blogger...

Popular Posts