Showing posts with label scrappy. Show all posts

Wednesday, 20 July 2016

Feather!

It is stash bee time again. I think we are almost done with this bee, and it has been one where we gradually got slower and more relaxed about timing, but we all stuck in there, and got stuff done.

This month it was feathers. We were asked to do scrappy, and sent the pattern, and background fabric. And so, it happened.

 I think I fulfilled the brief? Certainly scrappy!  I am leaving the trimming, so Svea gets to size it right for the rest of the blocks.

I may try to remember to stick this one in for Nicky's scraptastic, next month!

It should get posted in the next couple of days.....

Sunday, 26 July 2015

Presents..

To me!


I arrived home from work on Friday to find a package awaiting.. Inside beautiful flowers, all in shades of yellow and white. I added some Lady's mantle and some osmanthus from the garden, and filled this vessel, which now sits in my hallway, and also....


This one, which is currently cheering my living room.

These were a thank You, for having made the bridesmaids dresses for that recent wedding.

I had the joy of making, and I also got flowers! Win-win!

 Then yesterday, at work, this amazing piece arrived!


A candle tree made by an elderly gentleman, from bits in his garden, just for me!
You must excuse the background, my usual chaos reigns... 


I am impressed with the loving patience this man put in to make something just for me! He has varnished it exceedingly thoroughly, which brings out the colour of the wood.

I think it is likely to come out at Christmas, for the future. Once I have stopped smiling every time I look at it, it will go away until then!


I have had a good week! I hope your week was equally good!


Sewing?


Oh! sewing!

Only a little and sort of secret...


here is a little sneaky peek!

All will, eventually be revealed...


Monday, 20 April 2015

A pincushion for your machine, and a small giveaway!

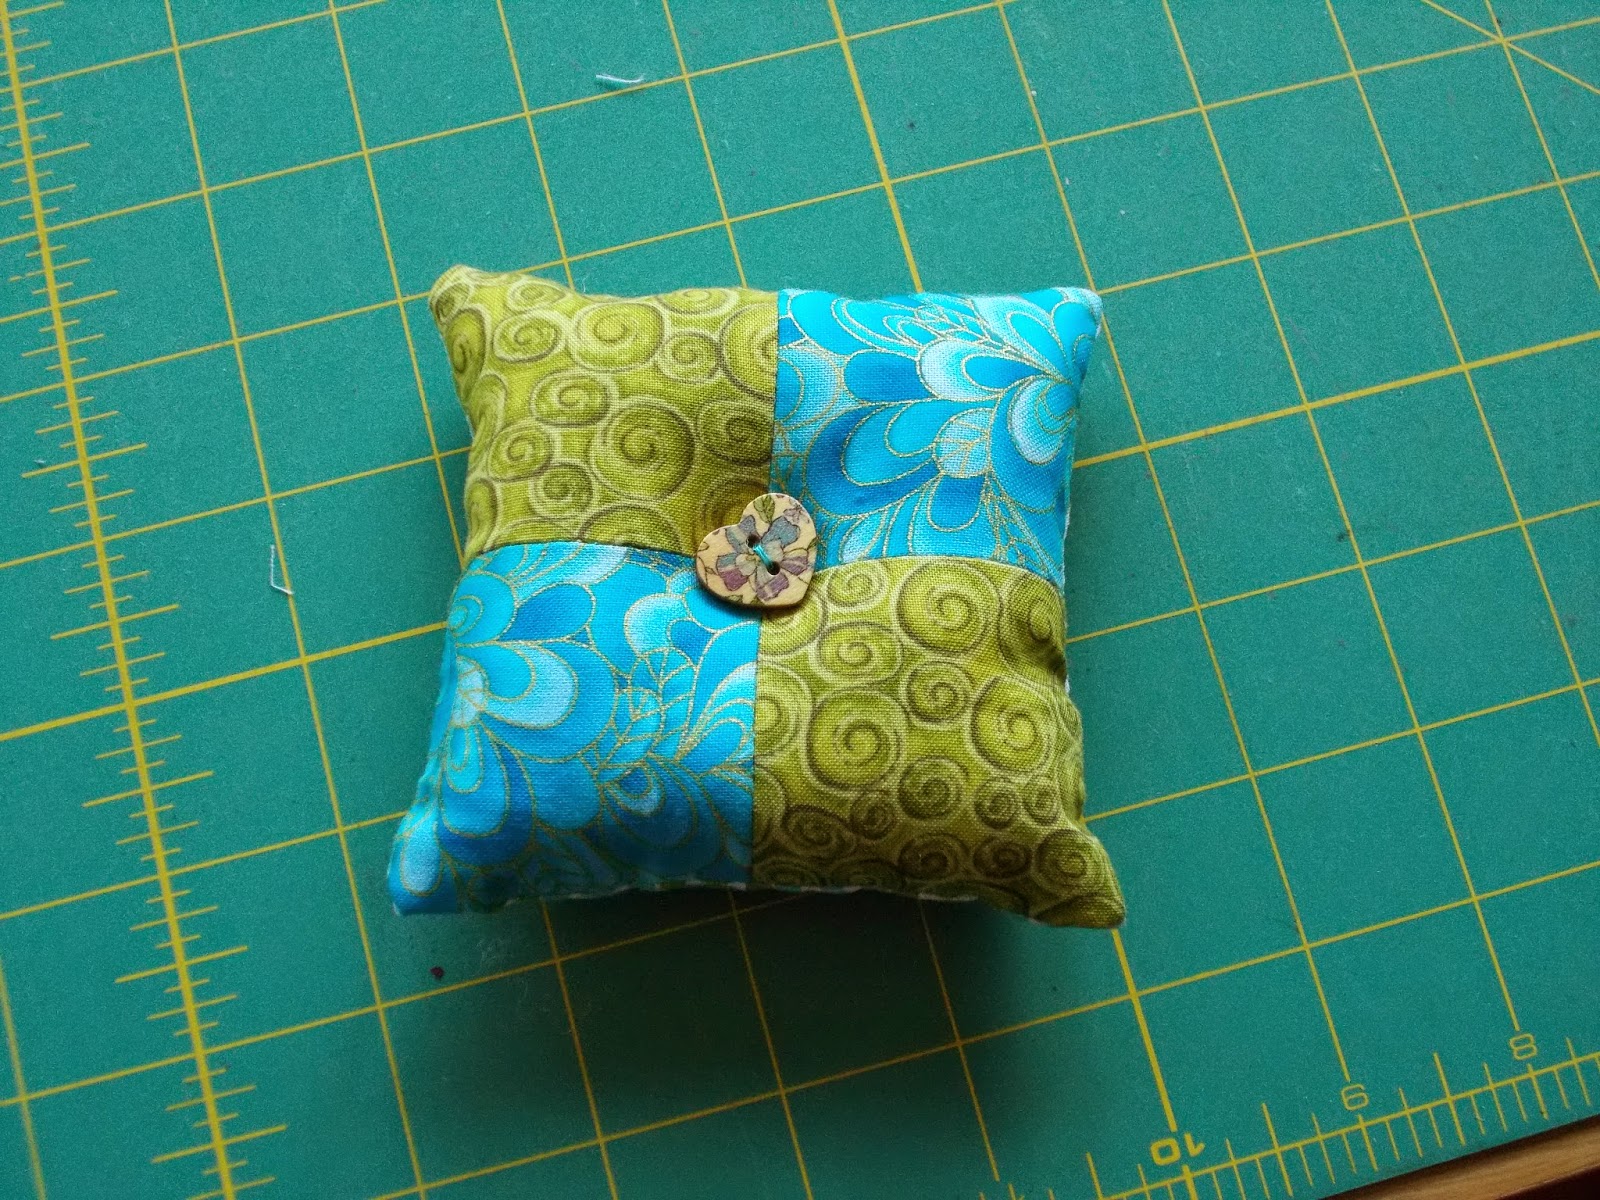
You saw the pincushion I made for my swap partner, and the one I made for myself, which happily fasten round the sewing machine? I have promised to write up a tutorial for this, so you may make one for yourself- if you do, please tell me, I would love to see your results!

This is the one I made originally, because I end up with a pile of pins beside my machine, and a scattering of them on the floor- I needed that pinnie ON the machine...
So, I made a few more for favoured people... including this one for my Tote bag swap partner...

And it seemed sensible to write  a tutorial for it- You can just make it up as you go along, after all, that is exactly what I did... Or you can follow a set of instructions...


This is a perfect pattern for using a few scraps!

So, what do you need?

Those scraps!

Some elastic, long enough to go round your machine, with a little tension on it,

Stuffing for the pin cushion

a button,
some wadding- tiny offcut- you shall see...

co-ordinating thread

snap fasteners


Ready to go?

Cut
4.5" square- for the back
2 coordinating strips, one each 2.5" wide by 5" long
strip about 30" long ( may vary, according to your machine-more later) 2.5" wide
Strip 2.5" wide by 5" long.


Elastic- My machine measures approx 23", so I cut my elastic at 20". It needs to be long enough to fit with a slight stretch.

 Start with the strips!

take your 2.5" x 5" strip. Fold in half along the length, WRONG sides together. Press. You now have a strip 1.25" x 5". Fold the raw edges in to the centre fold, and press.  The strip now measures 5/8" x 5".
Stitch close to each long edge.

Set aside.


Take your long strip, Fold along its length, RIGHT sides together, and stitch with a 1/4" seam. Turn Right sides out.
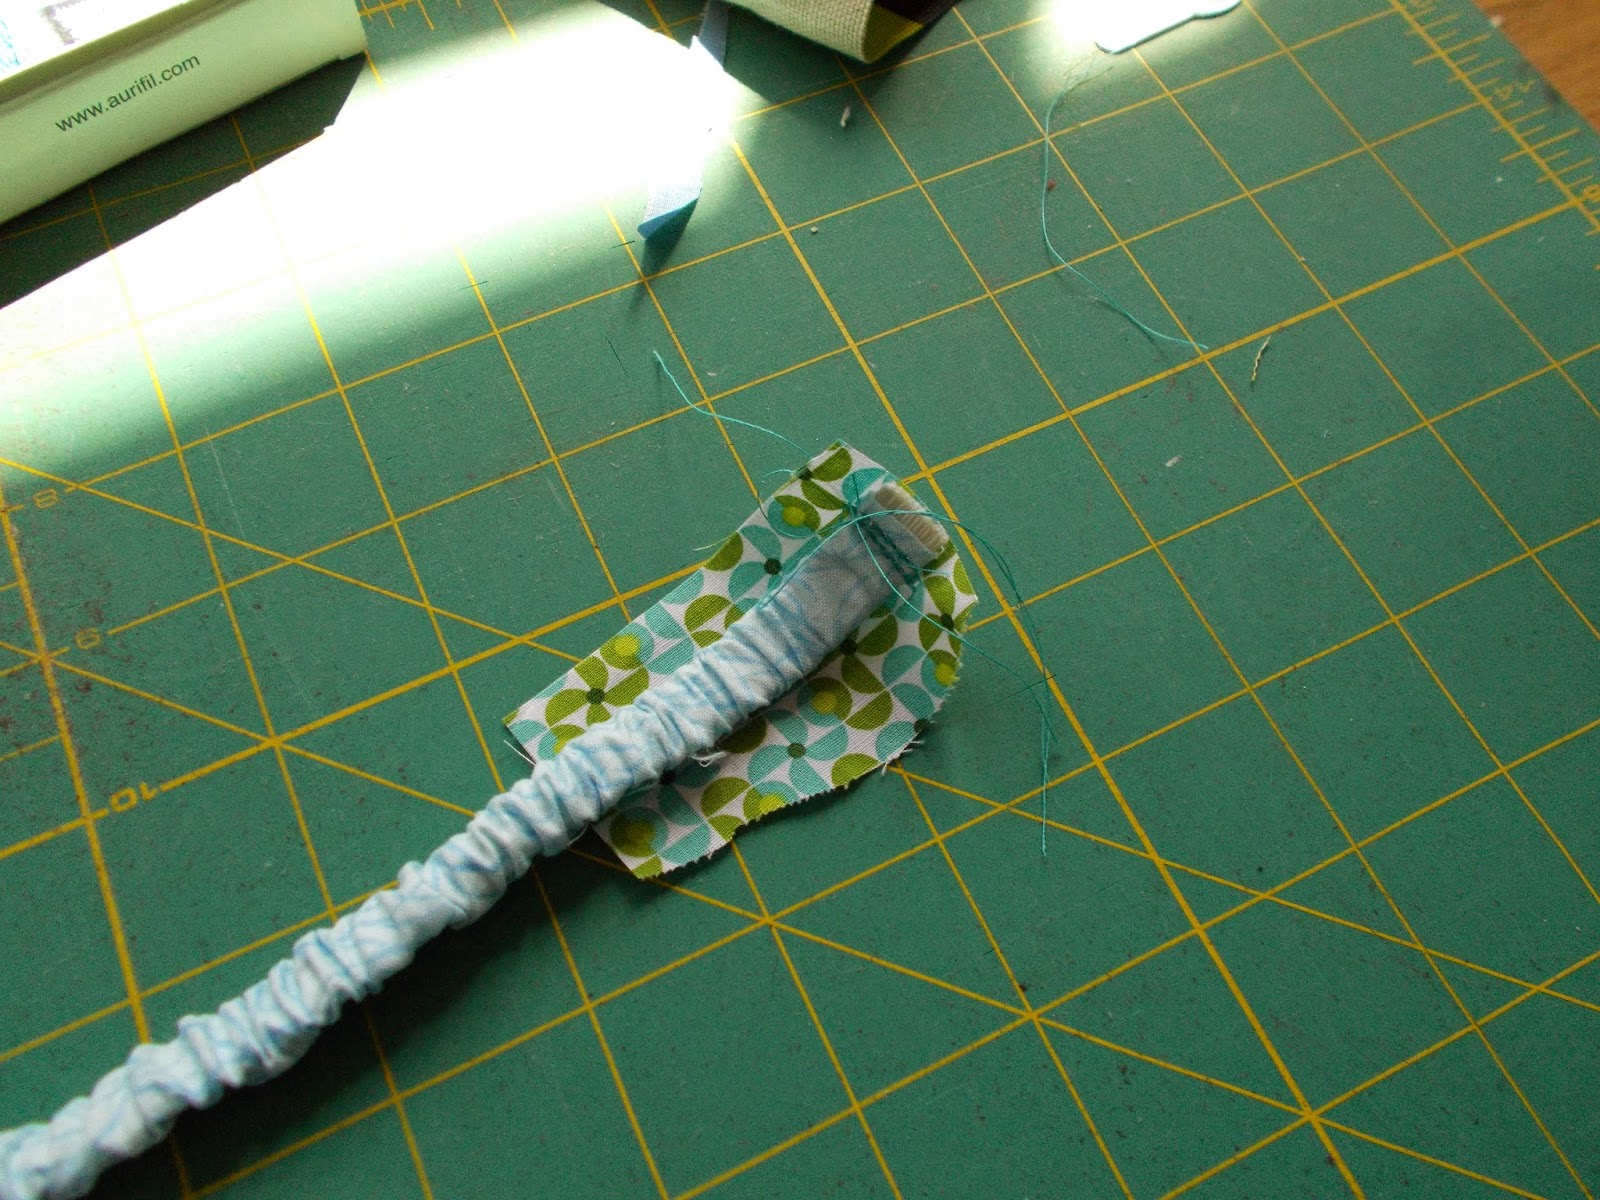
Now take your elastic, and attach a smallish safety pin to each end. Thread your elastic into the tube, and as the back end is trying to disappear into it, use that safety pin to attach it at that end, while you get the rest threaded through... The beauty of this is, if you lose the end up the tube, you will be able to retrieve it without pulling it right through and starting again...

You now have a piece of elastic inside a bunched up tube.
Machine stitch across both ends to anchor it firmly, remove safety pins, and then stretch the elastic and the tube, until the tube is full length, and let go, This should have distributed the excess evenly, to give a pretty ruffled effect.

Now you need to put ends on so you can fasten it.. This is what I do, but feel free to vary it, and use sewn poppers ( snap fasteners) or 'velcro'.

Cut two pieces of scrap, a little over 1/2" wider than your elastic strip, and about 3" long.

 Place the elastic strip on the end tab, as shown,


 Sew firmly in place. Turn it up the other way, and press.


Now take your offcut of wadding, and mark a piece the width of your elastic, and cut.


Tuck the end under the fold, and carefully press the sides in, to enclose the edges of the wadding, and the end over a little,


I use a needle to help get a neat fold over here, fold over and press, the stitch neatly in place.
and repeat for the other end.

I then attach 'kam snaps' as fasteners, they are quick and easy, and seem secure. Please attach whichever fastener you find easiest.


Set aside.

Pincushion. 


Place strips 2.5" x 5" right sides together, Stitch one long side with 1/4" seam allowance.  Press open your preferred way.
Now cut 2.5" off one end, turn and place right sides together, and stitch to make a four patch. Press open.


Now take the short strip you made, and place on the right side of your 4.5" square, not quite centrally, as below.


Stitch the ends in place, there should be some 'spare' at the ends..


Now place the four patch face down on top of this.
Sew, starting part way across one of the sides, and remembering to do your back stitches at the start, round all sides, but leaving a 2" gap, for turning and stuffing! Back stitch at the end.


Turn through the gap you have left, the strip will help if you get hold of that, and poke corners out quite neatly.
Now stuff it fairly solid!

Hand stitch the gap shut, and sew the button centrally .


You may find this slips over your hand quite neatly when required, Just be careful of the pins sticking out the other side...


You can now attach the pincushion to your machine in the best position for yourself,


If you would like to have one of these made by me, please leave a comment at the end- I am willing to ship wherever, -just tell me which two colours you would prefer!

and feel free to pass the message on, if you wish!

One lucky (?) person will get chosen at random on the 25th, in the evening!

Thursday, 16 April 2015

sending...

So, I was in that tote bag swap, and I packed up my tote and posted it off. There may have been a couple of extra bits included... It is possible, for example, that one of these landed into the bag,


I had also made a couple of these pincushions to attach to the sewing machine lately, so  this one hopped into the bag....


 and then it felt like this dumpling should get involved as well... I am not quite sure why....


and then, one or two scraps of fabric somehow jumped out of my hands and tucked into pockets, too....

So a somewhat stuffed bag went off in the post... What do you mean? You haven't seen the bag proper yet??

Ohhh... well... How about this then?


with a zip pocket on the front.


but not on the back,


and a variety of internal pockets to go at.
This went in the post a week ago, and I am impatient for it to arrive at it's destination. I do hope my partner loves it....


linking with Scraptastic Tuesday!


Scraptastic Tuesday

Sunday, 6 July 2014

Early bird...

Hip bee fabric came really promptly this month, and with the help of Cindy's tutorial for this block, a mini scrappy stars block was easily accomplished. Just quoting my daughter here... a really good use of negative space...


Now, a couple of our bee members have had to drop out as we have gone along, which would leave the current queen several blocks short, we are all making two blocks per month, so two bees down, and you are four blocks out. So there are a few of us who volunteered to do a little extra. Good thing I was one of them! 

So, when I was half way through putting together the next one, and realised I had put the strips together in the wrong order... leaving me two half blocks which could not make a whole... in the block above, imagine I have the top half, and the left half.... Instead of getting the seam ripper out, I made more blocks and just matched the pieces to get the blocks as needed. Whew!
So now I have all four blocks ready to post. And quite early in the month... I better smile sweetly at my husband, he gets my Post Office duties most often!

Wednesday, 19 March 2014

stringy star!


Svea asked for a 12 1/2 " block, for our 'fat stash Brit bee', and I made an astronaut on the moon. But that only used one of the fabrics she supplied. And I had a little idea lurking for another block. About 18 months ago we made scrappy string star blocks for Jennie , and I just thought, that one would be ideal for Svea. as a small extra, as you do.. So, I got started. And wouldn't you know it, I made a 'rookie error'. I sewed the first piece onto the back as well as the front of my piece of paper.. 


 Looks fine, there, doesn't it?


 but turn over and....


 please can Mr Stitch Ripper come and play?

The next 'rookie error' I made was, I forgot that half these should be diagonal right to left, and the other half, left to right!

So, another couple of pieces had to be made...


But, eventually, it all came together, and the block has not only been made, but it is in the post, with it's little friend, on their way to a quilt for a space mad child!


If I did it again, I would ensure that the strings closest to the star were more of a  contrast, but, really, I was not ready to start again by the time I realised! It will have to do! And the recipient likes strings! so all is well!

Sunday, 2 February 2014

Sunday.. oh Sunday

 I have FMQed! really, I have! not very well, but I have been going for it. All those squiggly lines up there, that is FMQ!


 And this lot, too
 And when you put them together? they actually look a little better than they did on their own. Thank goodness, I did not fancy having to undo all that lot.
 So, I am joining them in pairs for the minute, Just sewing the quilt top bit together, trimming the wadding, and then lapping the back, and folding in one edge neatly, and topstitching.
 So far, three pairs together this fashion, and another part way and the fifth pinned.

One pair left to quilt yet, and then, I probably need four more trippy blocks, as I think it will be better as a 4 x 4 than as a 3 x 4...

 Topstitched down that edge..

Quite neat, I think, and I can always add a little more quilting if I feel adventurous!

so here are the three pairs work in progress...

what do you think, then?

Related Posts Plugin for WordPress, Blogger...

Popular Posts