Saturday, 28 July 2018

Wedding fun!

I cannot show all the people in this, as I do not have permission, but I had a ball making these dresses

This is the beautiful grey lace laid out on my bedroom floor being cut. As the fabric is one directional- though would anyone have noticed if I had cut panels upside down? Possibly not, but I would have known- I had to cut each piece on it's own. 
Why my bedroom? Because it has a large floor area, and is carpeted. If I am crawling all over the floor to cut, please have some sympathy for my knees!


The dress has an under layer of pale antiqued pink satin. again has to be cut all in one direction- how come I did not know that before?  I have made stuff up in satin previously, and cursed it as it snags and pulls, but this heavy satin from Watson and Thornton in Shrewsbury was a dream. Is sewed nicely, hung beautifully and was just amazing. The gentleman there was really helpful too. Great stock, and knew what to tell us. I recommend it!

The pattern was a vintage Vogue 2903 and in common with a lot of Vogue patterns was slightly unusual in construction. 

The dress is a princess seamed dress. All very straightforward there, yes, but, there is a yoke under the neckline, and the sleeve is hung from the yoke, and the side panels, without being stitched to the centre panels. So the centre panels are effectively sleeveless, and float free, - and hang beautifully I may say- so the original instruction tells me to construct the dress and form the sleeveless bit before putting on the yoke. 
Having made a toile I decided it would be simpler to make the centre panels and do the shoulder straps before adding the side panels. And it was. Much easier, and gave me a better finish. The other bit I changed, was the facing construction. In the original pattern the front and back facings are each in two pieces, which are then stitched together at center front and back. I looked at it carefully, in case there was a non straight of grain seam there, but it looked to be straight, so, I cut these on the flod instead. This reduced the bulk at the centre necklines, which helped a lot. 

In this image you can see how the shoulder 'strap' sits with the side panel sewn on. 

I had cut the under layer and overlocked to the lace before I started construction. This gave me much more stable fabric to work with, and seemed to be a good move. 


The instructions tell you to tack the pleats in place. I did this by hand- shows just how dedicated I was, hand sewing , even tacking, is not my thing!


As the lace has a very pretty border, we wanted to use that around the hem of the dress.So this border was carefully trimmed off, and stitched on at the end, onto sleeve hems and onto dress hem.


The sleeves have a slightly unequal underarm length, which is gathered to fit on the long side. The end result looks lovely, though I had not met this before. 
As the dress is very heavy I added ribbon loops from the underarms to help hang it up. It also has very wide neckline, and without these the dress wuold have fallen off the hanger in no time. 


This is just before doing the lace trim on the hem, when the lady tried it for a fitting. 


 We then made a 50's style net petticoat to go underneath.

She reported back from the wedding- so many compliments, she was thrilled with the result, and especially that the dress was unique!

So, the other dress?
Was the littlest bridesmaid's dress.

It started over coffee and cake.
The bride could not find the right dress for her youngest bridesmaid. She wanted her to be a 'mini-me'. I am familiar with this, as my daughter requested her youngest bridesmaid be a 'mini me'. In this instance though, the brides dress was quite sophisticated, off the shoulder, and not what you really want a 9 year old in.  However, covered buttons, yes we can do that, collar detail, yes,  and can we tie it in with the adult bridesmaids, who are in a pastel rainbow of colours...

I made a few suggestions, and it was decided the dress should be made.

They found an ivory crepe which matched the bride's dress perfectly, told me what was wanted, gave me measurements, and left me to it!
I found a bodice in one place, invented the skirt, sorted the collar, which was to mirror the brides dress detail, and I was given ribbon to use.
 The ribbons on the waistband are the same colours as each of the bigger lasses, the collar mimics the bride's dress.


and there are little hooks on the back of the bow, with hand whipped eyes on the dress, so they are all but invisible, to support the bow, or it will drop funny.


The bow is invented, and sewn together, so it did not need to be tied, and the ribbon tails left to flow free. I have seen the photos and she looks beautiful!

The skirt is part circular, and sadly the crepe stretched unevenly, despite being left to hang for a bit, It ended up nearly straight... Ah well, you cannot win all the time!

Tip for a bow like this- The sash is 3" wide, but a 3" bow looked wrong. So I made the bow 5" wide. Much better! I graded the ribbon out to the edges to look right.

Sunday, 6 May 2018

and done!

That quilt is now bound, and is ready to land in it's intended destination. I am very happy with how the binding went on.
Any quilt police looking?   no?     well, I overlocked all round the edge before putting the binding on.


As the overlocker's 'bite' is just on 1/4" it gives me a neat finish, to which I can then apply the binding, and as long as my seam allowance is just a tiny tad bigger, the overlocking is hidden, and I have a neat secure edge to work with. 


And here is the back. There is a fun play of reflected sun from my windows on these ones, with the morning sun in my garden. 

I think I can call this one DONE

Saturday, 5 May 2018

Adventures in FMQ

I have admired peoples FMQ for a long time. I have wanted to have that skill, so I could FMQ and feel, well, happy with the end result. But it takes practice. And I do not want to have to practise.

However, I had a little project just for me. So I am not inflicting my substandard work on another unsuspecting body. So, is this not the perfect time to get on with it?


I am going to pop this little fellow in my car- that emergency blanket you are meant to carry? Yes, this will be the one.  So, as it is for me, I could carry out the plan, to FMQ.

I started by doing one line of an old pattern that I like, seemed suitable, and that is adaptable. This first one is not FMQ. It is done using the walking foot and a blend of manipulation, organic line, and stop start while moving stuff around. I have used this leaf and vine pattern a few times, I lay no claim to it, but I always just did it off my own bat, without thinking too hard. That is the left hand vine on the photo above. 

Then, I put on my quilting foot, put my feed dogs down, and went for it with the FMQ version. The first try is that vine on the right in the photo above. 

 And then I did more lots. Some are better in some places than others are in other places. That is what practice is all about, though, isn't it?
Yes, I can pick fault all the way down the line, and there are some bits which would benefit from pulling out and restarting, but, the whole effect seems to me to be acceptable, if not perfect anywhere. I finally feel I have started to FMQ in a very rreal way. I have ended with an item I can be not too ashamed of!

Now, don't you be pulling too many holes in my work, I have very tender feelings just now!

What have I learnt? 

Reduce the pressure on the presser foot, even though you do not see that it should be needed as the quilting foot doesn't really hold the quilt down- It still helps!

Perhaps a broader sweep of pattern would be an easier start. I should have worked up to those fiddly leaves a bit more.

Be content with 'acceptable' do not insist on 'perfect' . 

For the lines across the bottom, which were done after the leaf pattern, I FMQed those too. There I found a better result with 'pedal to the metal' but trying to keep my 'feed' fairly slow and even going through. Still not perfect, but it will do!

I still need to bind it, but shall have to go and buy the fabric for the binding, I just do not quite have enough to do without.  Ho hum. 

Any thoughts, folks? How did you get on with FMQ? Have you tried it? Are you still too wary? 

Sunday, 8 April 2018

Design issues

Confession time. Ok, I bought fabric. I needed a particular type of design for that birdie swap.


But, yes, but. I loved the colours, and the design, so I got rather more of it than I strictly needed. Apart from the fact that they were not exactly going to sell me just three or four motifs, now were they?


And I got some coordinating fabrics too.

And I had an idea for a quilt top using these with some solid alongside.

And then I got to planning.


So, the next thing is to look at how the motif will fit in the item, and to measure the repeat.

This is where it all starts to go pear shaped.


( Interesting reflection from the window there almost looks like a pattern piece... )

The horizontal pattern repeat  is 6". In other words, Quilt-Speak as it were, 5 1/2" finish, maximum. 


Then the vertical repeat is 3 7/8", so that puts us into 3 3/8" finished, maximum.
What on earth can I do with those figures?

Apart from that, either the pattern is not quite printed straight, or the fabric had warped, so it is not quite cut straight. There will be some waste.

So, watch this space, I am working on it! I have some ideas, but.....

Any suggestions out there? Please?


Saturday, 31 March 2018

Little bits...

So I decided to make another wallet, for a daughter. I was not at all sure if she would go for it, but an hour or so after receiving it she was quietly transferring stuff into it, so I guess she was quietly pleased!
 You may notice, this is the same fabric as the bag she was given at Christmas. I think that bag was a tad small, so is not seeing a lot of use. I hope this will be more useful.


This comes from the Zakka style book,  but this time I took fewer liberties with the pattern.

Yes, I did sew the binding onto the outer before I sewed on the zip, which definitely made life easier.

Another time? I would insert the zip pocket before cutting the outer to size, as it was just a scrap tight, so came out overall a little smaller than it would have done.


I love that the whole thing opens out flat,


Inside
Outside


 And did you see these wee cuties? On the zip pull? 

Dead simple to make- a bit fiddly, but not difficult. A pin from pinterest gave the instructions, but lots of pictures made it simple to follow. 

I am planning a couple more of these, but will need to go and get longer zips than those I have currently in stash.  Who has a zip stash?? Me, I am afraid. Guilty. I hate being stymied in a project because I need a different zip!

And then I spent a bit of time this morning, dressing a wee bear. 

This chap came with a new car. But he was all naked except for a bow. He told me he did not wish to remain bare, as well as bear... so could he please have a waistcoat? 

And here it is. 

Isn't he a happy chappie now? I hope he does not also now demand trousers.


Sunday, 11 March 2018

Received...

My birdie pouch came through just as I posted off mine to my partner.  so, here is what I was gifted with,
Would you believe, my brave partner had never installed a zip before. Well, I can tell you, I would never have known. She did a perfect job. 

And look at my goosey heads! aren't they just lovely! I love the bright colours and the 'attitude' they emanate! 

And then there were extras. Wee notelets, flannel printed with birds, and some plushies. 


I think I did very nicely thank you!

And the twist? I sent to her and she sent to me! fair exchange, eh?

Wednesday, 7 March 2018

last swap

I joined a group a wee while back, and have had a few swaps with them. Sadly the numbers swapping have diminished, so now the swaps are done. Not enough folk happy to make and post off to who knows where for the joy of an exchanged swap. So, my final offering for this group was
'Put a Bird on it... and in it!'
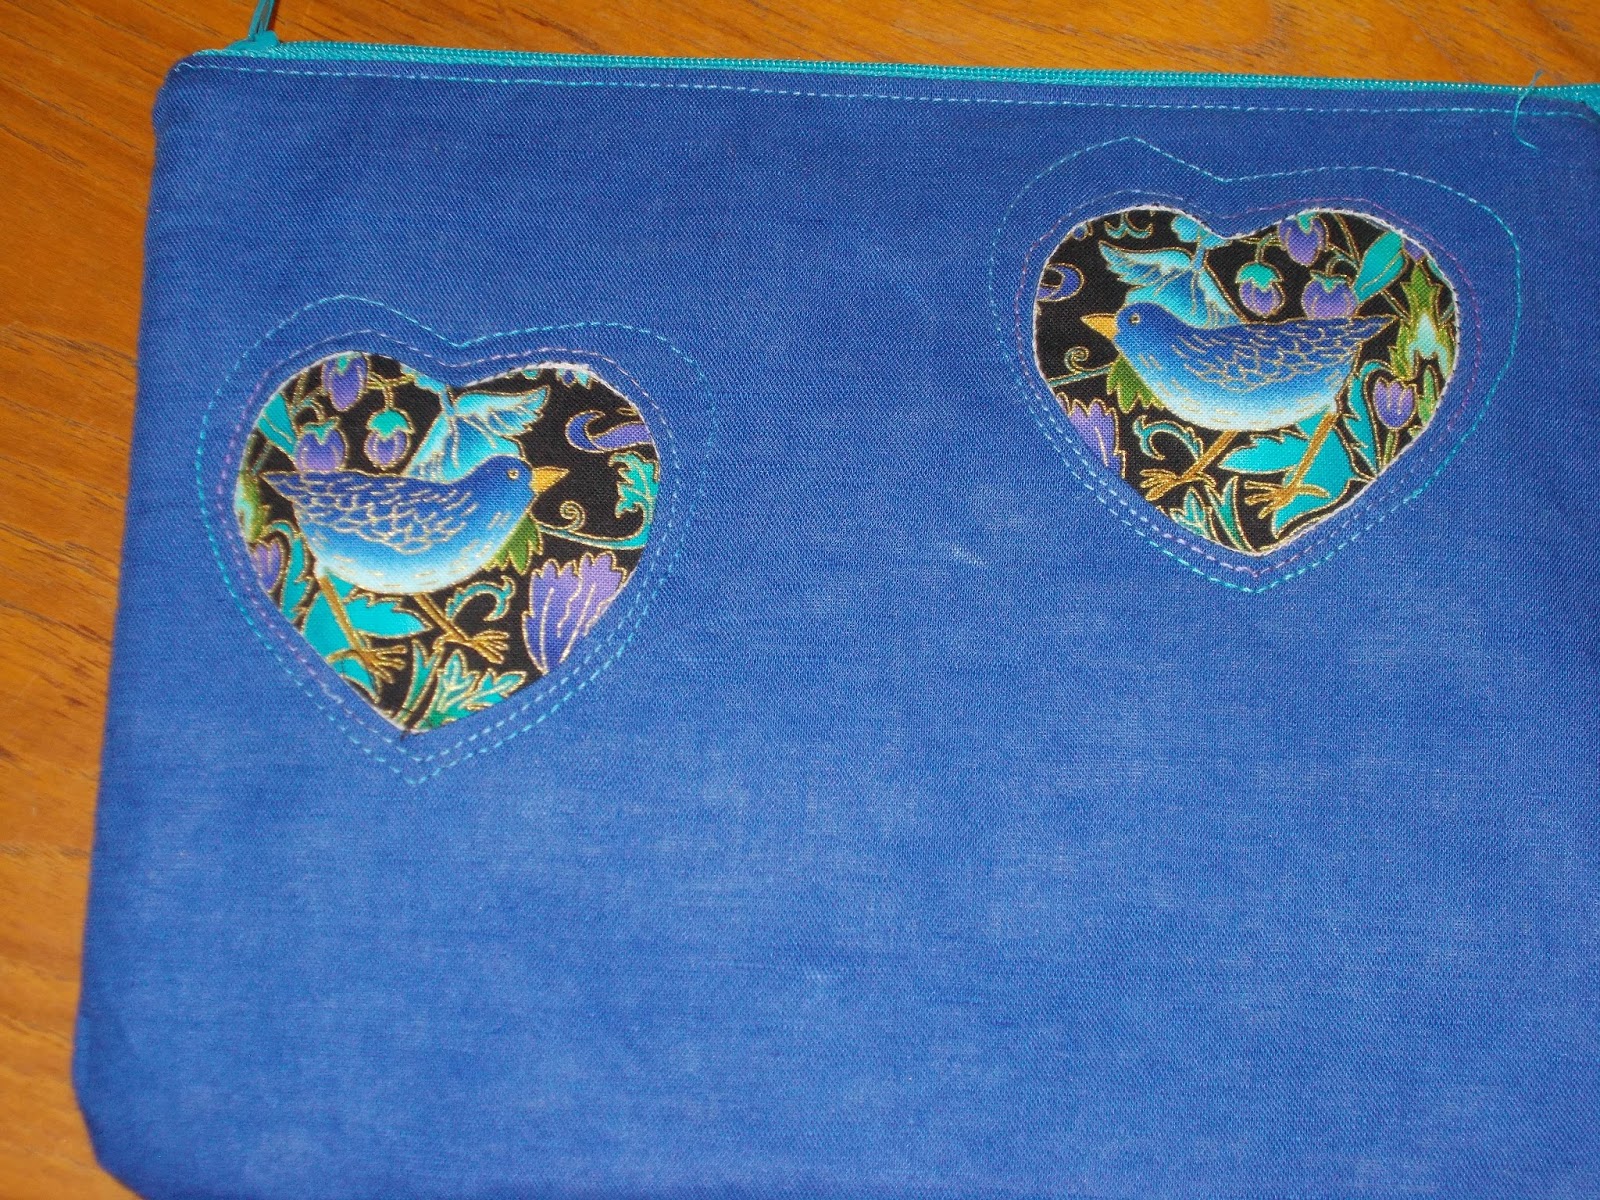
 I found amazing glorious rich fabric with a bird, just perfect for putting a porthole into, and showcasing the little chap


I love a sneak peek, so I out up this picture and my partner quickly responded, so I was certain she liked where I was going.  The blue linen I had had for another task, so it was a simple choice to make, and I had a pretty variegated thread which pulled up the colours in the bird fabric.

 I saw a tutorial on youtube, which showed how to make a pouch with multiple pockets. I vaguely followed that, but made my own dimensions, so this ends up with two large pockets, one small zipped pocket and two slips between the small zip pocket and the larger pockets. All fastened with one large zip across the top.


To put a bird in it I looked at owl pincushions here there and everywhere... I looked at how they were constructed and then off I went and redesigned the dimensions to make my own version- thank you everyone out there who has published their own versions!

Basically, you draw an isosceles triangle, then a shorter fatter one. Cut from chosen fabric.  Match the bottom edges, and sew one to t'other, and then sew the other side, wrong sides out , also stitching the top part of the larger one. Flatten him out, and trim the point, then turn. Fold down the top point and stitch firmly to the middle of his tummy. Gather stitch round the base.

Cut out a suitable size cardboard circle- I use the famous cereal packet for this- and cut a circle of fabric for the base about an inch larger in diameter. I then interfaced this circle, and gather stitched the edge, and pulled it in carefully round the card. Press like mad.

Now stuff your Wol, as fat and firm as you please. I used polyester filling, but walnut shells are probably better- just a major dirth of these in my house- and hand stitch the base to Mr Wol. Plump him up, add suitable eyes, and you are done. He is a really quick make.

Confession time- I meant his feathers to point down, but cut him wrong... so he has slanty feathers. Sorry partner.. But she is quirky.   She has been named Georgina, by her new human. Most suitable I think!


I was rather chuffed with the finish. I think there may be one or two more of these before I am done...

  When I was making my pouch I managed to make a boo-boo. I put my bird in facing the wrong direction. hey, it happens. So now, I have a piece that needs using, but is not quite what had been planned.

A few years ago I got a book- given? bought? not sure. called something like Zakka style.. This wallet was in it. not quite the same size, but I adapt most things, so a variation on the theme of the zakka style wallet appears.
I love how it opens out quite flat. You can see my birds facing away from one another. It works for this though!


Again, I think a few more of these may appear shortly.


A couple of owl buttons, and a few other sundries, and my parcel was ready to wing it's way across the Atlantic, which it managed in just under a week...

My partner has received her package, and seems to like it!

This was a secret partner swap, so nobody knows who is sending to them...  Sneaky swap mamas gave us each other! Fantastic sneaky mamas!


I will blog about what I received soon! It was rather lovely... don't hold your breath though.. I am busy just now.. Costumes.

Related Posts Plugin for WordPress, Blogger...

Popular Posts