I joined a group a wee while back, and have had a few swaps with them. Sadly the numbers swapping have diminished, so now the swaps are done. Not enough folk happy to make and post off to who knows where for the joy of an exchanged swap. So, my final offering for this group was
'Put a Bird on it... and in it!'
I found amazing glorious rich fabric with a bird, just perfect for putting a porthole into, and showcasing the little chap

I love a sneak peek, so I out up this picture and my partner quickly responded, so I was certain she liked where I was going. The blue linen I had had for another task, so it was a simple choice to make, and I had a pretty variegated thread which pulled up the colours in the bird fabric.
I saw a tutorial on youtube, which showed how to make a pouch with multiple pockets. I vaguely followed that, but made my own dimensions, so this ends up with two large pockets, one small zipped pocket and two slips between the small zip pocket and the larger pockets. All fastened with one large zip across the top.
To put a bird in it I looked at owl pincushions here there and everywhere... I looked at how they were constructed and then off I went and redesigned the dimensions to make my own version- thank you everyone out there who has published their own versions!
Basically, you draw an isosceles triangle, then a shorter fatter one. Cut from chosen fabric. Match the bottom edges, and sew one to t'other, and then sew the other side, wrong sides out , also stitching the top part of the larger one. Flatten him out, and trim the point, then turn. Fold down the top point and stitch firmly to the middle of his tummy. Gather stitch round the base.
Cut out a suitable size cardboard circle- I use the famous cereal packet for this- and cut a circle of fabric for the base about an inch larger in diameter. I then interfaced this circle, and gather stitched the edge, and pulled it in carefully round the card. Press like mad.
Now stuff your Wol, as fat and firm as you please. I used polyester filling, but walnut shells are probably better- just a major dirth of these in my house- and hand stitch the base to Mr Wol. Plump him up, add suitable eyes, and you are done. He is a really quick make.
Confession time- I meant his feathers to point down, but cut him wrong... so he has slanty feathers. Sorry
partner.. But she is quirky. She has been named Georgina, by her new human. Most suitable I think!

I was rather chuffed with the finish. I think there may be one or two more of these before I am done...
When I was making my pouch I managed to make a boo-boo. I put my bird in facing the wrong direction. hey, it happens. So now, I have a piece that needs using, but is not quite what had been planned.
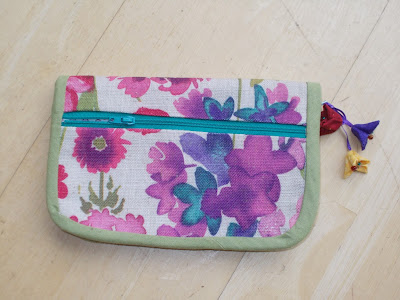
A few years ago I got a book- given? bought? not sure. called something like Zakka style.. This wallet was in it. not quite the same size, but I adapt most things, so a variation on the theme of the zakka style wallet appears.
I love how it opens out quite flat. You can see my birds facing away from one another. It works for this though!
Again, I think a few more of these may appear shortly.

A couple of owl buttons, and a few other sundries, and my parcel was ready to wing it's way across the Atlantic, which it managed in just under a week...
My partner has received her package, and seems to like it!
This was a secret partner swap, so nobody knows who is sending to them... Sneaky swap mamas gave us each other! Fantastic sneaky mamas!
I will blog about what I received soon! It was rather lovely... don't hold your breath though.. I am busy just now.. Costumes.


