Kindle tutorial for Julie
 We are going to make a neat kindle cover. When I acquired a kindle, I looked at covers. I am a somewhat forgetful soul at times, and the kindle comes with an essential lead, which is required to plug it in and recharge, and may also be useful for loading books onto it. Most covers do not have a useful storage section designed for this lead, and I could see, there was a strong likelihood of losing said lead, and so I need a safe, secure storage for it. Preferably with the kindle itself, so that I do not look at it later and say,
‘What the Dickens is that for?’
 So for security, I need a zippy pocket. Hold on there a moment, will the zip scratch my kindle? Can’t have that, I will put a flap over the zip.
This cover took me about 3 hours to make, and that was with stopping for photos all the time - it took far, far longer to write the tutorial!
I am an impatient soul, and tend to ‘wing’ it a lot when I sew, but I have tried to make this comprehensive, but sometimes that is less than clear, so
Please read all instructions very carefully, and if you have any questions, contact me directly!
Materials needed,
Outer skin- 12” x 7.5”
Lining-12” x 7.5”
Pocket-10” x 7.5”
Pocket flap 5” x 7.5”
Window 5” x 7.5”, twice. Once in interfacing
Binding, approx. 48” x 2.5”- a little longer makes life simpler!
Tab 1 ¾ “ x 4” twice- fabric and once in interfacing
Zip, at least 6” long- you can shorten longer zips, but it is very hard to stretch one!
Wadding, I used an iron on wadding, designed for bags.
Button, or magnetic closure, or press stud, if preferred.
Cereal packet- for the cardboard to do your template!
 Now, I only have the basic Kindle, and the dimensions are a little different if you have one of the superior models, so do check your dimensions, do not just blithely follow mine, and end up with a giveaway for A.N Other, rather than your own lovely kindle cover!
I made a cardboard template for my kindle, and a paper pattern for the ‘window’ . I also kept my kindle handy, as I could use it to check my details as I went along.
Once these are done, you can get on with the fun bits!

First, cut your fabric to size,

With this lovely ‘Down Under’ fabric, from Julie it would have been good to put my animals on the outside, but as the background is white it would get dirty quickly, so I chose to use a darker fabric for that, and the animals as a cute secret for the inside.
Method
Tab

I am afraid I generally make my tabs too long! So please make yours the length that suits you best!
Cut a template, for the size and shape you want, And layer the interfacing on the wrong side of one side of the tab- see the image above, Draw round the template and stitch just inside this line.
 Now use your male half of the magnetic fastener, and using the washer as a guide, mark the buttonhole places, and make your tiny buttonholes again.
you will see, I have marked the seam allowance round the outside of the tab stitching here, as a Cutting Guide.

Please make sure you really make those tabs firm with a plier!

As you can see. I put an extra piece of interfacing in for reinforcement.
Then layer up your tab, right sides together, and stitch round on the sewing line again. You will probably need to use your Zipper foot for this!

Trim neatly, on the cutting line


And make some tiny cuts up to but not through, the stitches – see next image!

This lets you turn it inside out, and get a reasonable curve, rather than something that goes pointy on you!
Use the blunt end of your stitch ripper (the handle!) to really smooth out those curves.
If you prefer a button and buttonhole, miss out your magnet, and make a buttonhole the right size, after turning tab right sides out!
Outer cover

Take your outer fabric, and your wadding, pin and quilt as preferred,
Now you need to plan your magnet, if you are using one.
Don’t do as I did, and place it too close to the edge, that just makes the binding difficult to sew on, later. Position this at the centre of one short end of the outer, about 1 ¼” in from the edge.
Magnetic fastenings come in 4 parts, 2 washers, and a male and a female part.
Use the washer to mark where the washer needs to be attached, and make tiny little buttonholes, with some interfacing behind for added strength. Pierce the buttonholes, put the female in position, washer on the inside, and fold over the flaps. Use a pliers to secure firmly.
If you are using a button, that can be sewn on right at the end.
Now place tab in position, at the centre of the opposite short side of the outer, you will have half the magnetic fastener at each end. Use your logic, when it folds in half, and you wrap the tab round, the magnetic fasteners should meet!

Window
Use your template/ pattern to mark the corners of the window on your fabric.

please note- there is a wider strip on one side, than the other! This is essential!
These points are going to be your CUTTING guide.
Draw a sewing guide ¼” outside these.
See image below

Now stitch along the sewing line of each piece separately, for the ‘notch’ at the bottom. This is for added strength, and to reduce the likelihood of stretching in use.

Now layer it up, fabric right sides together, and a piece of interfacing underneath. . Sew along your sewing guide lines of the window only.
At this point, I like to check my window actually fits.

Place your window over your kindle, and trace the outline of the text page with your nail, you will feel it quite easily through the fabric. Adjust now if necessary!
Then you can cut the actual hole! Use those corner marks to assist. You now have a couple of really good size scraps for another project!

Clip into the corners, without cutting the stitches at all, and turn it right sides out.Straight through the window. Feels odd, but it works!

Press firmly.
Now the tricky bits! You see where that pencil line is?

Carefully cut that out.

And clip into the corners as before..,

ready for some fiddly ironing? You need to fold your fabric inside, along those reinforcing seams, and press really firmly. Starch it if possible!

Topstitch 1/8” from the edges.
Do the same along the long narrow edge, fold in ¼ “and topstitch 1/8” from the edge. Also topstitch round your window, 1/8” from the fold. Leave your wider margin raw. That will be fine- promise!
Whew! It’s all easy from here…
Pocket and lining
The trickiest bit of this is putting the zip on the back! But, that is not too hard, with what you have already done. Here you go,
Mark your slot, 5“ x ¼ “
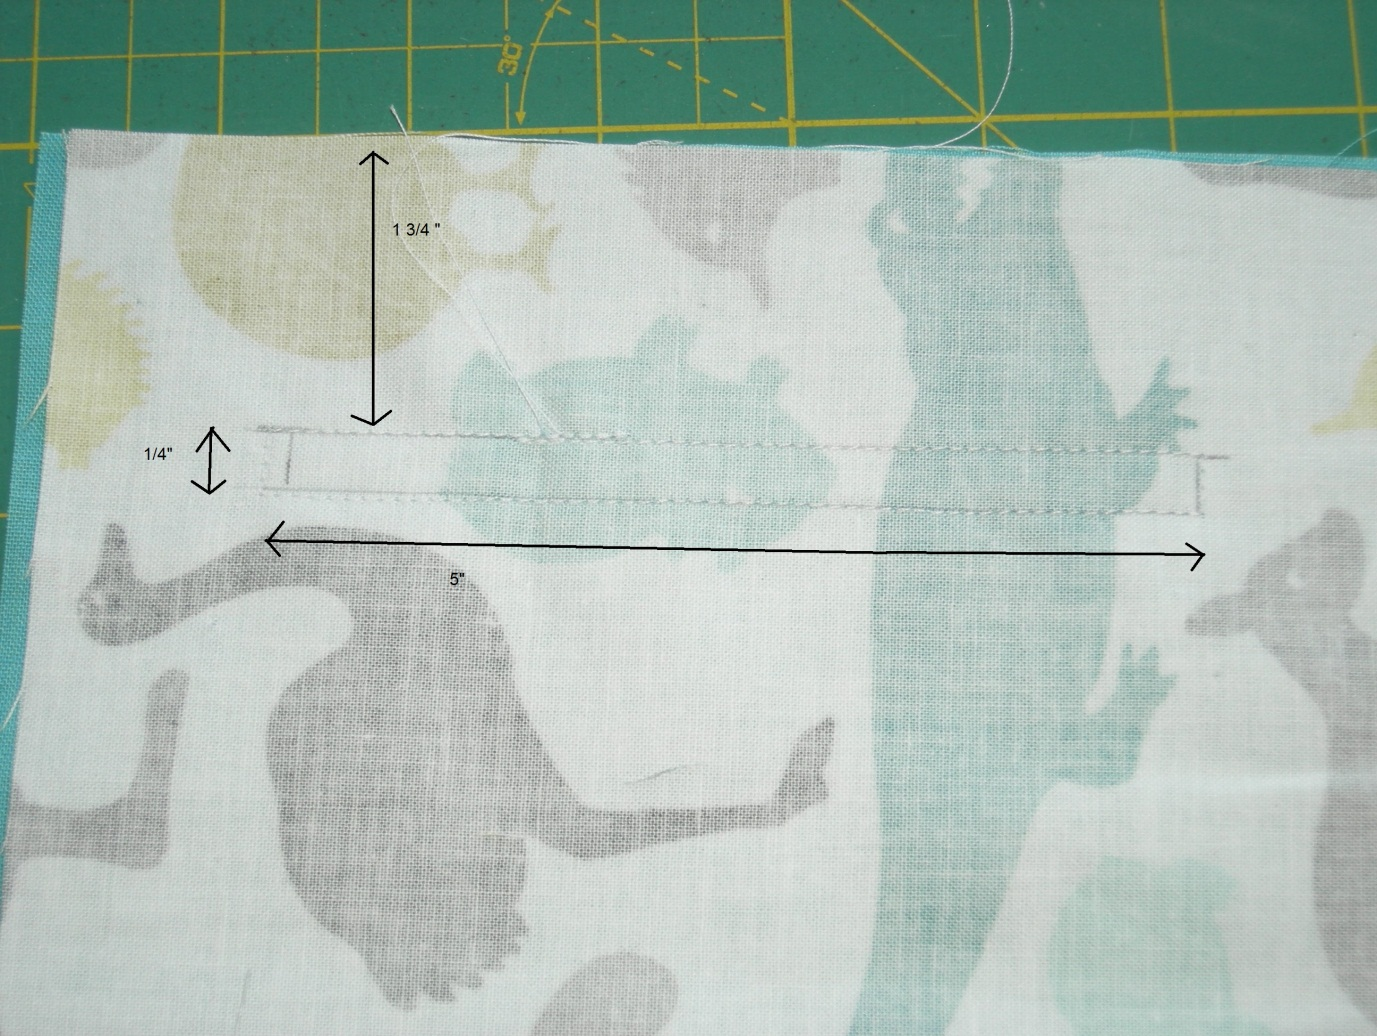
Put the pocket piece under your lining piece, right sides together, and sew along the outline of your slot.
Now mark in your slot, as shown in the next photo,

And cut along these lines, careful not to cut through your stitches, but snipping neatly into the corners.
and turn right through your slot


and press well, to give nice crisp edges to your slot.

You now need to lay your zip, symmetrically behind the slot
 This is fine, they will be chopped off later, but get your zip pull inside the slot- or how will you open it?
pin so it will be stable, ( excuse the fuzzy photo!)

and sew right round your zip, using the zipper foot. You can see the zip ends sticking out here. That is fine!

Fold the pocket up at the back.

and press.

Pocket flap
Take your pocket flap piece, fold in half, right sides out to give apiece 2 ½” x 7 ½ “.

As you can see- I am of the ‘make it up as you go along, and measure later’ school..

Pin in place, and secure by sewing inside the seam allowance, so these stitches will hide when it is finished. You now have a hidden zip pocket.

At this point you may attach your window also- I know I did it earlier, but it made it slightly unwieldy, so I recommend you do it at this point, instead! Sorry!
The wider, raw edge of the window is at the right hand end of your lining. Check the fit now, as it is easier to adjust now than later. It should be very snug!
Assemble your layers
On your work table, make your sandwich.
place your outer, Right side down. Wadding is up!
Then lay your lining, on this, right side up. If your fabric on your outer is directional, ensure this is doing what you want it to, very frustrating to discover later, that it is upside down! Pin carefully, but sparingly, and stitch right round, @ 1/8” from the edge.

Trim all sides neatly! This will take off your excess zipper ends at the same time.
You will notice I have not left an ‘access hatch’ for the right hand side page turners. This is because the fabric is soft enough that it is not needed. You will be fine like this!


Binding
The total distance round this is 39”. I recommend you make a binding strip at least 48” long! This gives you a little playing room for getting it really neat. If you are an expert, by all means use a piece that is just long enough and no more, but you have been warned!
Bind in your favourite style,or follow me!

Sew strips together to get a long enough overall length,
Fold your binding strip lengthwise, and press. Starching really helps here, too.
Starting in the centre of one side and leaving a reasonable tail, match the raw edges of your kindle cover, and of the binding together, and stitch ¼” from the edge. Stop ¼” from the corner, and secure.
Do that tricksy thing where you fold the long tail up at 90 from the kindle, and then back down to match your new side,

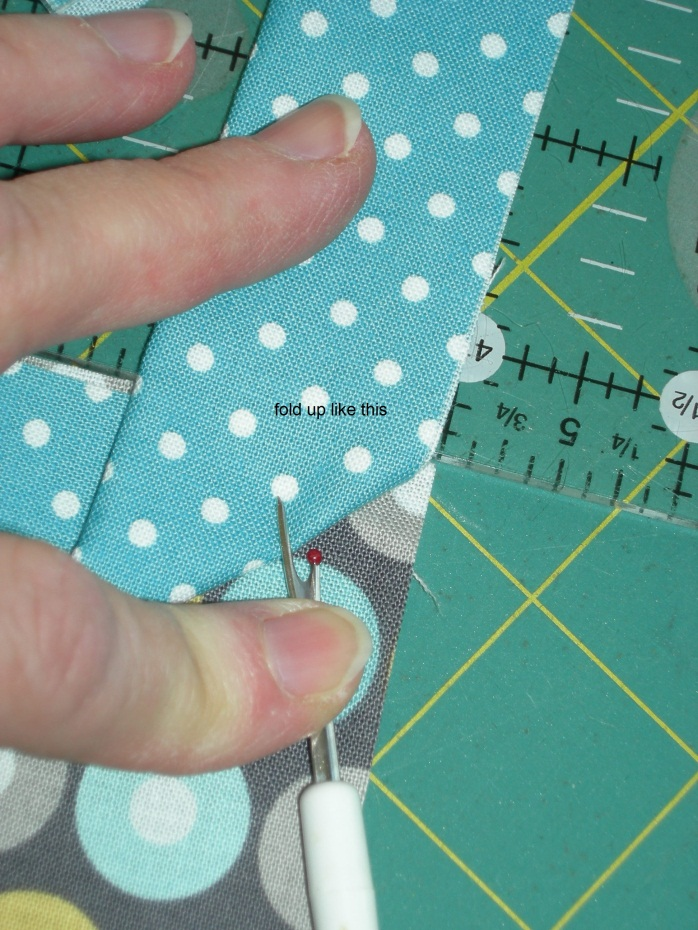


When you get within 3” - 4” of where you started, you need to stop, fasten off and sort out your meeting point.
I prefer not to sew the two ends together. Take one raw end, open it out,


and turn under ½”, and press

fold back together,

and press again.
Now, open it out, along the edge of the cover, and sew it in place, open like this

 Trim your other end, so there is about ¾” – 1” overlap, line up accurately, and sew this end down. fold back over, and sew down securely. You can catch stitch this fold later if you feel it is needed.

Now fold your binding out from the kindle cover, and press flat.

now fold the binding over the raw edges, and pin in place.
Do all the sides, and then come back and play with your corners. You can get a really neat mitre with a little care!

Flatten down the corner, opening it out, as above,
again- sorry about the photo quality!
and then use your stitch ripper, to get a good fold


And pin this securely.
You may now sew it down, either by hand, or with your machine


Voila!


