 Alright, this weeks block from the skill builder, is this pretty star, built up with pairs of diamonds, and then the squares and triangles inserted with those lovely (forced grin) corner seams. You start with strips. Two in one colour, and two in two different colours. Sew strips together, in pairs, lengthwise. Cut on the diagonal to produce paired diamonds. Take one from each combination, nest together, and sew. Hey presto, a four part diamond appears.
 Hmm.
Well two were fine and six required attention. but in the end, I ended up with all eight being satisfactory. No, I did not say perfect. They will not bear the scrutiny of an unkind eye. But they were near enough for me to say, doing it again might end up worse!

So, with points matching, I am ready for the next bit. Sew them together in matching pairs. Which was not so bad.
Then add in the triangles. Two of these units get connected, and the square sewn in.
Now, up to this point all appeared to be going according to plan.
Oh, don't the gods laugh when you get confident. More on that later. Swans!

It doesn't look so bad does it?
But, why does it have that funny fold in the middle? And if you look carefully, there is a sort of circle effect going round near the points of my floral star.
Want a closer look at the pleat in the middle?
Go on, have a good laugh! I suspect this would be great on a very fat cushion! Pre-shaped even.
But notice too, if you can, how all my points matched on this!
It had to come apart again. And was resewn. Now it lies flat. But the points do not match. :-(
have another look, just not too close a look! I think it is ok, because of the busy pattern in the middle.
Ok , I did say the gods laugh.
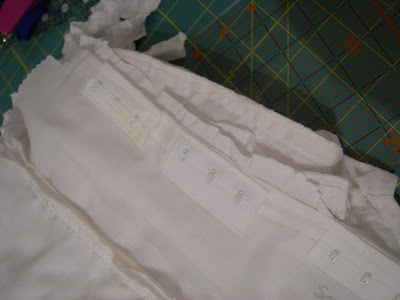
I had a few adjustments to make to my swans, including adding a bit more hook and eye tape, to prevent gaping. I normally just run a line of tape top to bottom, but I knew I was running out, and it would be a while before I could get any more. A few days type of while, not months or anything. So I tried to economise.
Have you ever noticed, when you try to economise, it nearly always ends up costing more in time and trouble, than if you hadn't?
So, I had to add a section in the middle. On most of them, this was fine, but, you couldn't do it if you tried, on a couple, I added the hooks back to front.
Can you see? the middle lot of hooks will not hook, so they have to come off and go on again, the right way round.
Ho hum.
Now, a while back, in the skill builder, we appliqued by a number of different methods. Circles. I cut out my paper patterns using a nifty little device which is basically a compass, with a blade instead of a pencil. Alright, a pair of compasses,with a blade....
If you pop over to the Quilting Lodge they are doing a giveaway of a rather posher version of this, which cuts through fabric. I do not know if mine will do this, as I haven't tried. They also have some tips and a really lovely table runner thing with circles to use this for- so go have a look, and you might try to win the cutter. I think it is also rather larger than my one, and will cut bigger circles..
Good luck!
And I finally got around to putting some of my skill builder squares together in a quilt top today.
 Hurrah!
I find I have several distinct groups of them, some more yellow, some cream and some white. So, that is how they are going to be matched.
I am considering doing a double sided one, with the cream on one side and white on t'other.
I think this needs a border, but I do not have the right whatever for this. So at present it is 'cooking' in my brain to see what I want for it.
But it is getting there. perhaps a deep green? Any thoughts?


1 comment:
economy and perfection are overrated in my opinion!! looks good to me xx
Post a Comment